Monday, July 8, 2013

Caramel Apple Cheesecake Bars

So I made this phenomenal dessert over Christmas, and it was such a big hit! But like a fool, I lost the recipe! I will find it, I promise. because I need to make it again! It was so freaking good! I have to find it. Here are pictures to remind me of what a dumby I am for losing it, because just look at it, soooo good.


Once I find this recipe I will post it! I promise. 
Luvyerguts<3 N&A

Raspberry White Chocolate Wedding Cake!

So one of my best friends recently got married, and I was lucky enough to be her maid of honor, and she asked me to make her wedding cake! I was so honored. The beautiful bride to be and her hubby decided on one of my favorites, the white chocolate raspberry! So good!
Here is the gorgeous bride to be! She even got her "something borrowed" from me! That wonderful necklace is from me :) I also found this awesome hand towel for the kitchen while I was out buying ingredients for the cake! It is so perfect :)
And here is the cake!It is not my best work, but hey, it tasted delicious!

Recipe:
2 1/4 cups all-purpose flour
2 teaspoons baking powder
1/2 teaspoon salt
1 1/3 cups milk
4 ounces (2/3 package) white chocolate , chopped
1 teaspoon pure vanilla extract
3/4 cup (1 1/2 sticks) butter , softened
1 1/2 cups granulated sugar
2 eggs
1/2 cup raspberry preserves  2-8 oz. packs of cream cheese
2 cups powdered sugar
2 oz. white chocolate (melted and cooled)

Preheat oven to 350°F and prepare a 10 inch square pan and a 6 inch round pan.
In medium bowl, combine flour, baking powder and salt. In small microwave-safe bowl, heat milk until hot, but not boiling. Add white chocolate; stir until chocolate melts. Add vanilla; set aside. In large bowl, beat butter and sugar with electric mixer until light and fluffy. Add eggs, one at a time, mixing well. Add flour mixture alternately with melted chocolate mixture, mixing until just combined. Pour into prepared pan.
 Bake 12-16 minutes or until toothpick inserted in center comes out clean. Cool 10 minutes in pan; remove and cool completely on cooling grid
To make the white chocolate cream cheese frosting, cream the cream cheese. Whip the cream cheese until fluffy, and add in the white chocolate. Mix until incorporated, and add in the powdered sugar.
After the cake is cooled, slice the square cake and the round cake in half, lengthwise. Fill with a layer of cream cheese frosting, then top that with a hefty layer of raspberry preserves! do this to all of the cakes! Then layer on top of each other and to a crumb coat on the cake, freeze or refrigerate until the crumb coat is nice and sturdy. Frost with the remaining cream cheese frosting.
Slice it up and enjoy!

 Luvyerguts<3 N&A

Strawberry Short-Cupcakes

Oh lordy I have been falling behind. But you know, life gets ya some times! I finally graduated from college! yay!! And I had my thesis show, Muted. (which you can view on my photography site, www.jessicanicolewhite.com ) and moved to Virginia, then to Florida...then back to Texas. So I have been a little bit busy, busy!! And now I am ready to start blogging again! Woo!!
Once I got back to Texas, of course I made some delicious cupcakes! They were so good! I also made some cookies, but I forgot to take pictures! (silly me!) But these are a semi-healthy cupcake, well compared to other cupcakes, they are Strawberry Shortcake! Angel food cake, filled with fresh strawberry puree and then topped with fresh whipped cream! They are a new favorite!
I can't wait to eat more of them *nomnomnom*

Recipe:
1 1/4 C. Flour
1 1/2 C. Sugar
12 large egg whites
1 1/2 teaspoon cream of tarter
1/4 teaspoon salt
1 1/2 teaspoon vanilla extract
~15 Strawberries
1 C. Heavy whipping cream
1 tsp. vanilla
1/2 C. powdered sugar

Preheat oven to 350 degrees.  Line cupcake pans with paper liners.
Place egg whites in a large mixing bowl and beat at high speed until egg whites are frothy, approximately 1 minute.
Add cream of tartar, salt and vanilla to egg whites.  Mix at high speed until egg whites are almost stiff, approximately 4 minutes.
Add 1 cup of sugar gradually while mixing on low speed.  Scrape bowl.
Mix flour and remaining 1/2 cup sugar together and spoon 1/4 of mixture over egg whites, folding gently between each addition.
Pour batter into cupcake liners until they are 2/3 full.  Bake for 20 to 25 minutes or until tops are golden brown and cracks are very dry.
Cool cupcakes completely before removing from pan.

 To make the strawberry puree, rinse your berries, then process in a food processor or blender until they are nice and pureed! Using a knife, or apple corer, take a small amount of cake out of your angel food cupcakes, and fill with some fresh strawberry puree.

To make the topping, take the heavy whipping cream and put it in a stand mixer fixed with the whisk attachment. Whip on high speed until stiff speaks form. Add in the vanilla and powdered sugar and mix just until incorporated. Frost your cupcakes and enjoy!
<3luvyerguts<3 N&A

Wednesday, October 3, 2012

Stuffed Chicken Breasts

So this summer I made a lot of delicious treats, but this one here, the spinach, mushroom and cheddar stuffed chicken breasts, oh lordy- these were my favorite! I love chicken and spinach and mushrooms and mostly, CHEESE!! so of course these little guys were over flowing with cheesy goodness! So much deliciousness!! YUM! So without further ado here is the recipe:


Ingredients:
1 or 2 chicken breasts
1 cup sauteed spinach
1/2 cup sauteed mushrooms
1 cup shredded cheese, any kind you'd like

Directions:
Preheat your oven to 350. 
First take a meat tenderizer and flatten out the chicken breasts. Flatten them out enough so you can roll them up later. Make sure your spinach and mushrooms are nice and seasoned, with salt and pepper and whatever else you want! 
Next lay down your cheese, this goes first so it doesn't fall out when you roll up the chicken. Then put down the spinach, then the mushrooms. Roll the chicken up, and stab with 2 toothpicks so it doesn't unroll. 
Place your chicken in a glass pan lined with foil, then stick in the oven for about 25 minutes. In the last 3 or 4 minutes, top with some more cheese! 
Take out, let it cool, then enjoy your delicious creation!!

Baby Shower Cupcakes

So this summer my best friend from high school had her baby!! Which of course means she had a wonderful baby shower, for which I baked some deliciously cute cupcakes! Since it was summer, I decided to do my favorite summer time cupcake, Lemon Blueberry! And I made them boy-themed, since she had a little boy, named Conor! And he is adorable!!! :) Since I already posted the recipe fro lemon blueberry, i thought I would just share some pictures from the partay!! :)
 Yummy Cuppycakes with white chocolate rubber duckies on top! They were so cute!!

 Nummy Nummy :D


And heres the beautiful mother to be, Dani. She is unwrapping all her awesome presents! Conor is born now, and he is so cute! I already miss being with him!!

Sunday, April 29, 2012

Strawberry Cheescake Cupcakes

My bestie-esty just turned 24! And despite being my bestest friend, she is not a huge dessert fan!! =O but...she does love a good cheesecake! And she loves strawberry cake! So I decided to combine her two favorite treats into one! A strawberry cake filled with a cheesecake filling and topped with a strawberry cheesecake frosting! It was soo delicious and cute :) a pretty pink color! Yum! She loved them! And I took them to my photography show as a treat and everyone enjoyed those as well! They are so delicious! :) 
Enjoy!


Ingredients:

Cupcakes:
2¼ cups all-purpose flour
½ cup cake flour
1 tbsp. baking powder
1 tsp. salt
2 sticks (1 cup) unsalted butter, at room temperature
2¼ cups sugar
1½ tsp. vanilla extract
3 large eggs plus 1 large egg white
1 cup milk
2½ cups finely chopped fresh strawberries

Filling:
8 oz. cream cheese, room temperature
½ cup sour cream
1 tub thawed Cool Whip
2 tsp. vanilla

Frosting:
 8 oz. cream cheese
½ stick butter
4 cups powdered sugar
2 tsp. strawberry extract
¼ cup sour cream

Directions:
To make the cupcakes, preheat the oven to 350˚ F.  Line cupcake pans with paper liners.  In a medium bowl, combine the all-purpose flour, cake flour, baking powder and salt; whisk to blend.
In the bowl of an electric mixer, combine the butter, sugar and vanilla.  Beat on medium-high speed until light and fluffy, about 3 minutes.  Beat in the eggs and egg white one at a time, mixing well after each addition and scraping down the sides of the bowl as needed.  With the mixer on low speed, add the flour mixture in two additions alternating with the milk, mixing each addition just until incorporated.  Gently fold in the chopped strawberries with a spatula.
Divide the batter between the paper liners, filling each about ¾-full.  Bake until light golden and a toothpick inserted in the center comes out clean, about 25-28 minutes, rotating the pans halfway through baking.  Allow to cool in the pans a few minutes, then transfer to a wire rack to cool completely.
 To make the filling, combine all the ingredients in a bowl except the cool whip and mix until combined. Fold in the whipped cream until its a bit fluffier. Cut out a small core from each cupcake and fill with the cheesecake.
To make the frosting, cream the butter and cream cheese. Add in the sour cream and strawberry extract. Add in the powdered sugar one cup at a time until your frosting is smooth and delicious.

Frost your cupcakes and serve them up! They are so rich and delicious, they are a perfect treat for any occasion! 
Enjoy!
Luvyerguts<3
N&A

Lemon-Blueberry Cupcakes

Hello again!! I am done with school for this year! yay! So I have been making treats for my classmates on the last days of class! So I thought since it was the beginning of spring, I needed to make something fresh and delicious!  And I have made these cupcakes before, and received rave reviews! So I wanted to make them again! They are soooo flippin yummy! One of the best for spring and summertime! Plus the icing on top is pretty much the best thing EVER! Lemon cream cheese! Mmmmm...soooo good!! =D So here it is for ya'll! Recipe adapted from Annie's Eats


Ingredients:
Cupcakes:
¾ cup plus 2 tbsp. all-purpose flour, divided
¾ cup cake flour
1½ tsp. baking powder
¼ tsp. salt
8 tbsp. unsalted butter, at room temperature
¾ cup plus 2 tablespoons sugar
Zest of  1 lemon
2 large eggs, at room temperature
1 tsp. vanilla extract
2 tbsp. lemon juice
½ cup plus 2 tbsp. milk, at room temperature
1 cup fresh blueberries

Icing:
8 oz. cream cheese
1 stick unsalted butter, at room temperature
  4 cups powdered sugar
  2 tbsp. freshly squeezed lemon juice

Directions:

Preheat the oven to 350˚ F. Line cupcake pans with paper liners. In a medium bowl, combine the ¾ cup all-purpose flour, the cake flour, baking powder and salt; whisk together and set aside. In the bowl of an electric mixer, combine the butter, sugar and lemon zest. Beat together on medium-high speed until light and fluffy, about 2-3 minutes. Beat in the eggs one at a time, blending well after each addition. Beat in the vanilla and lemon juice. With the mixer on low speed, mix in half of the dry ingredients just until incorporated. Blend in the milk. Mix in the remaining dry ingredients, beating just until incorporated. In a small bowl, toss the blueberries with the remaining 2 tablespoons of all-purpose flour. Using a spatula gently fold the berries into the cake batter. Divide the batter evenly between the prepared liners, filling each about ¾ full. Bake 20-22 minutes, or until a toothpick inserted in the center comes out clean. Let cool in the pans 5 minutes, then transfer to a wire rack to cool completely.To make the frosting, combine the cream cheese and butter in the bowl of an electric mixer. Beat on medium-high speed until well combined and smooth, about 2-3 minutes. Mix in the lemon juice and lemon zest. Gradually beat in the confectioners’ sugar until totally incorporated, increase the speed and then beat until smooth. Frost cooled cupcakes as desired. 

These cuppycakes are sooo yummy! I ate like 8! haha! I was a fat kid! :p Enjoy them while they last!!

Luvyerguts<3
N&A

Monday, April 23, 2012

Chocolate Chip Cookie Dough Cake

So! Since its been so long, I am ambushing you guys with treats galore!! Here is another delicious treat! It is one of my boyfriends favorite, and I tend to make it for his birthday every year! Since he is so dang picky, its hard to actually find a delicious treat he likes! So I make it a lot! I also make these in cupcake form! They are super delicious either way, but this is the cake version! Its really easy! Yay! Cookies and cake in one!!! (well kind of cookies....but the dough is the best part anyways!)
 (Adapted from Annie's Eats
Ingredients: 

Cake:
3 sticks salted butter, softened
1½ cups brown sugar
4 eggs
2 tsp. vanilla
2 2/3 cups flour
1 tsp. baking powder
1 tsp. baking soda
¼ tsp. salt
1 cup milk

Cookie Dough Filling:
4 tbsp. unsalted butter, at room temperature
6 tbsp. light brown sugar, packed
1 cup plus 2 tbsp. all-purpose flour
7 oz. sweetened condensed milk
½ tsp. vanilla extract
¼ cup mini semisweet chocolate chips

Frosting:
3 sticks unsalted butter, at room temperature
¾ cup light brown sugar, packed
3½ cups confectioners’ sugar
1 cup all-purpose flour
¾ tsp. salt
3 tbsp. milk
2½ tsp. vanilla extract

Directions:

To make the cake, first preheat your oven to 350°! It has to be nice and toasty for the cake. Take your flour, baking soda, baking powder, and salt and sift together into a bowl and set aside. Then take your room temperature butter and cream it with the brown sugar.Add in the eggs one at a time, mixing until incorporated after each egg. Blend in the vanilla. Alternately add in your milk and dry ingredients, start and end with the dry ingredients. Separate the batter into two grease 9-inch pans. Bake for 20-25 minutes or until a tester inserted in the middle comes out clean! Take out and let cool.
To make the filling, cream the butter and sugar together. Add in the flour, mix well. Use your sweetened condensed milk, sometimes this doesn't take the whole 7 oz. you may use less, just mix in the 'milk' until you get the consistency of cookie dough. It will be a little bit stickier than regular dough though! (ha, I rhymed :p)


Mix in the vanilla and the chocolate chips! And you're done! 
After your cake is cooled, and you have evened out the tops (if you want, its not totally necessary!), take the cookie dough and spread in the middle. Make sure its on nice and thick! The more the better! Yummy in everybody's tummy :) 
To make the frosting, beat together the butter and brown sugar in the bowl of a stand mixer fitted with the paddle attachment until creamy. Mix in the powdered sugar until smooth. Beat in the flour and salt. Mix in the milk and vanilla extract until smooth and well blended. Then ice your cake all pretty!

I used some wilton fondant and put that on top of the icing, just to try out using fondant. It didn't taste that bad! From what I heard the fondant would taste gross, but mine was ok! I also cut out circles and made it polka dot for mah boyfrand :p 
Sorry for the crappy picture though :(

Enjoy!!
Luvyerguts<3
N&A

White Chocolate Raspberry Cupcakes

So here's another recipe for you :) Considering these cupcakes are in our pictures on the top page, I figured it was about time I got around to posting the recipe for them! And I am super excited because I'm almost done with school (3 more days!!) and then I get to take a nice long drive with Mr. Martini back to Texas!!! And get to see my lovely seester!! Yayyy Seester!!! :D
Anyways, these delicious cupcakes, the white chocolate raspberry ones, are my all time favorite cupcakes. They are sooooo good! They cake is a rich flavor and it is filled with a raspberry mousse, then topped off with a delicious white chocolate buttercream! :) yuummmm. It's really easy to make too! I lovvveee them! And they are great for the 'fancier' parties! Enjoy!

Ingredients: 

White chocolate Cupcake:
1 3/4 cups plus 2 tablespoons all-purpose flour
  1 teaspoon baking powder
1 teaspoon baking soda
1/4 teaspoon salt
  1 1/2 sticks unsalted butter, at room temperature
1 1/2 cups granulated sugar
3 large eggs
3/4 cup milk
1 1/2 teaspoons pure vanilla extract

White Chocolate Buttercream:
 1 stick butter
1/2 cup milk
6 oz. white chocolate (melted)
1 teaspoon vanilla
5 cups powdered sugar

Raspberry Mousse Filling:
1 8 oz package cream cheese, SOFTENED
1 15 oz jar seedless raspberry jam, all fruit
1 8 oz tub Cool Whip
Directions:

Preheat the oven to 350°F. Sift together the flour, baking powder, and salt.
Beat the butter with the sugar with an electric mixer on medium speed until light. Add the eggs, one at a time, scraping down the sides of the bowl between each addition. Stir together the milk, lemon juice, and the vanilla. On low speed, add half of the milk mixture. Mix until incorporated; scrape down the sides of the bowl. Add half of the dry ingredients. Mix until combined and scrape down the sides of the bowl. Add the remaining milk mixture and the dry ingredients in the same manner. Divide the batter among the 14 cupcake molds. Bake on the middle oven rack for about 15-18 minutes 
To make the icing, blend the butter and milk together until creamy. Add in the powdered sugar one cup at a time. Mix for about 1 minute until it is light and fluffy! Then mix in the melted white chocolate. Make sure that you didn't burn your chocolate, otherwise it will make your icing chunky! Groossss. Blend in he vanilla last! 
To make the raspberry mousse, blend the cream cheese until soft, then mix in the raspberry jam. Fold in the cool whip. 
After your cupcakes are cooled, use a knife or corer and take out a portion of the center. Fill that hole with delicious raspberry mousse awesomeness then top it off with the white chocolate buttercream! If you'd like, garnish it with a raspberry rolled in sugar! YUM! 
Enjoy!
Luvyerguts<3
N&!A

Salted Caramel Banana Cupcakes

Hello! Sorry I haven't posted in well....forever...but school life has been heeccttiicc!!! But I promise to start up, and keep up! from now on! So for my first 'catch-up' post, I'm going to let you in on my recipe for the most delicious creation I've made! If of course, you like bananas! And I am a HUGE fan of banana cake. I decided to take some of my old bananas and use them up! And the best way...CUPCAKES! Yay!! My favorite! And I took these to my photography class, and everyone melted over how delicious they were! They do take awhile to make, so be wary of that!! Alrighty, here it is for ya'll!!

Ingredients:
Banana Cake:
2½ cups all-purpose flour
1 tbsp. baking powder
½ tsp. salt
12 tbsp. unsalted butter, at room temperature
2½ cups sugar
6 eggs
1 cup plus 2 tbsp. buttermilk
1 1/3 cups mashed ripe banana

Salted Caramel Buttercream:
2 sticks unsalted butter, room temperature
1 tbsp vanilla extract
1 1/2 cups powdered sugar
1/2 cup caramel
1/8-1/4 tsp salt
French Custard Filling:

1/3 c. sugar
1 tbsp. all-purpose flour
1 tbsp. cornstarch
1/4 tsp. salt
1 1/2 c. milk
1 slightly beaten egg yolk
1 tsp. vanilla
1/2 c. whipping cream, whipped
 Instructions:
 Make the french custard filling first, since it has to cool. In saucepan, combine sugar, flour, cornstarch, and salt. Gradually stir in milk. Cook and stir until mixture thickens and boils; cook and stir 2 to 3 minutes longer. Stir a little hot mixture into egg yolk; return to hot mixture. Cook and stir until mixture just boils. Add vanilla; cool. Beat smooth and fold in whipped cream. Cool in the fridge while you are doing the rest!
To make the cupcakes, preheat the oven to 350° F.  Line two cupcake pans with paper liners.  In a medium bowl combine the flour, baking powder and salt; whisk together and set aside.  In the bowl of a stand mixer fitted with the paddle attachment cream together the butter and sugar on medium-high speed until light and fluffy, about 2 minutes.  Reduce the mixer speed to medium low and add in eggs one at a time, scraping down the sides of the bowl as needed.  Mix in the mashed banana until well combined.  With the mixer on low speed alternately add the dry ingredients and buttermilk, beginning and ending with the dry ingredients and mixing only until just incorporated. Divide the batter between the prepared cupcake liners, filling each about 2/3 to ¾ full.  Bake until a toothpick inserted in the center comes out clean, about 20-22 minutes.  Allow to cool in the pan 5-10 minutes, then transfer the cupcakes to a wire rack to cool completely.
To make the caramel sauce, combine the butter, heavy cream and brown sugar in a medium heavy-bottomed saucepan over medium-high heat.  Bring the mixture to a boil, stirring constantly.  Once it reaches a boil, lower the heat to medium and continue to boil until the mixture is thickened, about 8 minutes.  Remove from heat and let cool.
To make the frosting, in a large mixing bowl, beat butter and vanilla on high speed until pale and fluffy, about 3-4 minutes.  Turn mixer to low/medium and slowly add 1/2 cup powdered sugar at a time.  Beat until combined.  Add in caramel sauce and salt.  Beat until desired consistency is achieved.

After Your cupcakes have cooled, use a knife, or a corer if you have one, to cut out the center of the cupcake! Fill that with the delicious custard filling, and then top off with the salted caramel buttercream! If you have caramel on hand, drizzle some on top just for good measure, and dab a bit of salt on top too! Then eat them! Cuz they are AWESOME!!

Luvyerguts<3
N&A

Friday, September 2, 2011

The Daring Kitchen, Challenge #1

Hey guys! So earlier this August N&A decided to join this super duper website called The Daring Kitchen, which is basically a site for super enthusiastic bakers and cooks to join up and do a "challenge" in their perspective field of expertise, you know, cooking or baking. Being the baker, N decided to join these fancy escapades and do their fancy challenges!! She wanted to find new and exciting recipes and different types of desserts to make :) The first challenge, and so far only challenge, N&A got to attempt together! and it was........
Making Your Own Candy!!!!
Now neither N nor A had made candy before, minus the occasional fudge (which even then was a little bit iffy). So this challenge was going to be a bit hard for us. We first started out by coming up with what kind of candy, because one had to be a chocolate candy, and the second could be whatever kind of candy you wanted. So we decided to make chocolate truffles!! A little bit of a stretch for the non-candy makers, but we tried anyways. 
Flavor wise we went with dark chocolate-mint truffles, white chocolate with Grand Marnie, and dark chocolate with Kahlua and pecans. Sooo delicious in the flavor combinations!! So to do these truffles we made a chocolate ganache, flavored it with however much flavor we deemed the right amount (probably too much haha), let it sit out and set up (which it didn't really set up so they were very goopy), and then roll into balls and dip in chocolate coating! It sounds so simple! But really, we had some issues!! But they still tasted delicious, even if they weren't super pretty!!


Ingredients for Ganache:
1 ¾ cup (9 oz/250 gm) Dark/Bittersweet Chocolate, finely chopped
2/3 cup (5 oz / 160 ml) Double/Heavy Cream (36% - 48% butterfat)
OR
1 ¾ cup (9 oz/250 gm) Milk Chocolate, finely chopped
1/2 cup (4 oz / 120 ml) Double/Heavy Cream (36% - 48% butterfat)
OR
1 ¾ cup (9 oz/250 gm) White Chocolate, finely chopped
¼ cup (2 oz / 60 ml) Double/Heavy Cream (36% - 48% butterfat)
For flavoring, add about 2-4 TBS. of your choice!

Instructions:
1. Finely chop or grate the chocolate
2. Place in a heatproof bowl
3. In a saucepan, heat cream until just about to boil (it will start bubbling around the edges of the pot)
4. Pour the cream over the chocolate
5. Gently stir the mixture until all the chocolate has melted and it is smooth
Tip: If you end up with pieces of chocolate that won’t melt, put the bowl over simmering water (but not touching the water) and stir gently until it’s all melted
Tip: Be careful if you do need to heat it over simmering water, if the mixture gets too hot it will split and you’ll end up with gooey chocolate swimming in oil, so don’t overheat the ganache, steam from a gentle simmer is all you need.
6. Stir in your desired flavorings
Mixing the chocolate and the hot cream!
Kahlua dark chocolate pecan mixture!

dark chocolate mint!

white chocolate grand marnier mix!
All 3 delicious creations!!


Truffle Instructions:
1. Allow the ganache to firm up in a container of choice, preferably deep rather than shallow
2. Using a teaspoon or melon baller, scoop up room temperature ganache
3. With gloved hands, roll the balls between your palms to round them off
4. Dip in tempered chocolate or roll in various ingredients like cocoa or chopped nuts as desired
Tip: If dipping in chocolate, it’s best to refrigerate the ganache balls before dipping so that they’re firm and don’t melt from the warm chocolate
Tip: For a thicker chocolate shell, dip once in tempered chocolate and allow to set. Then do a second dipping or smear a small amount of chocolate over the truffle and roll in desired ingredients
5. Place on parchment paper until set

Dark-Chocolate Mint Truffles
Dark Chocolate Pecan and Kahlua Tuffles


 Now for our second candy we went ahead and made more chocolate, since we're both chocolate fanatics :) We decided to make chocolate 'bowls' and fill them with various flavored mousse's. We made 3 bowls, one chocolate, one white chocolate, and one marbled. We then made 2 types of mousse's, cinnamon and nutmeg mousse and a peanut butter mousse. We topped the cinnamon mousse bowls with fresh fruit and a chocolate design, then the peanut butter mousse with just a chocolate design! Now to make these we just used a template from Micheal's and heavy cream to make the mousse, so we don't have a recipe! But it's super easy! And super delicious!!! Enjoy! =D
All 3 bowls, peanut butter in the middle :)
Cinnamon Mousse Chocolate Bowls

Thursday, August 25, 2011

Chocolate Chip Cookie Dough Brownies

Do N had to leave fantastic Texas last week =( But it wasn't all bad! When back in Indiana N's boyfriend surprised her with some super fantastic flowers! 
Lillies from N's boyrfiend :)

So of course she decided to pay him back with some DELICIOUS treats. And these aren't just normal treats, these are a combination of two of the most delicious desserts EVER!! And a special addition of N&A's favorite candy :) 
So brownies are N's boyfriend's favorite dessert, and he loves cookie dough! N has made cookie dough cake and cookie dough cupcakes and just plane cookies for him before! Now she discovered this recipe for the most amazing dessert ever. The Chocolate Chip Cookie Dough  Peanut Butter M&M Brownies. A combination of fantastic fudgy brownies, peanut butter M&M perfection, and the most delicious cookie dough ever slathered on top of it all!! so without further adieu, here's the recipe :)
 Apologies there aren't that many pictures! But the baking process was rushed! 

Brownie Ingredients:
4 ounces unsweetened chocolate, finely chopped
1 cup unsalted butter, at room temperature
2 cups light brown sugar
4 eggs
2 teaspoons vanilla extract
1 cup all-purpose flour
1 medium bag Peanut Butter M&M's

Cookie Dough Ingredients:
¾ cup unsalted butter
¾ cup light brown sugar
¾ cup granulated sugar
3 tablespoons whole milk
1½ teaspoons vanilla extract
1½ cups all-purpose flour
1½ cups mini chocolate chips

Instructions:
Pre-heat your oven to 325 degrees.
. Line a 9×13-inch pan with foil, with enough to hang over all four sides. Butter the foil. In a medium glass bowl, melt the chocolate in the microwave in 30-second increments, stirring after each, until melted and smooth. Set aside to cool slightly. In a large mixing bowl, mix the butter and brown sugar with an electric mixer on medium speed until light and fluffy. Beat in the eggs and vanilla extract, scraping the bowl as needed. Mix in the melted chocolate until combined. Reduce the speed to low, add the flour and mix just until combined (don’t over-mix). Stir in the m&m's with your spatula, try not to break them up too much! Spread the batter into the prepared pan. Bake 25 to 35 minutes, or until a toothpick inserted into the center comes out clean. Let cool completely.
To make the cookie dough, in a medium bowl, use an electric mixer on medium speed to combine the butter and both sugars. Add the milk and vanilla and mix until combined. Reduce the speed to low and mix in the flour just until combined. Using a rubber spatula, stir in the chocolate chips. 
Spread all this delicious mixture on top of the cooled cookie dough! Then put it in the fridge or freezer until the cookie dough is firm enough to cut with a knife. It makes the treat easier to cut if its colder and firmer! Then try not to eat all of it, although N couldn't resist having one....or 5....

<3Luvyerguts<3
N&A

Wednesday, August 10, 2011

Animal Cupcakes!

 So both N&A are working at a lovely summer camp at the YMCA. We are both counselors for a "theme camp" and last weeks theme was "Wild Kingdom". Now being as awesome as we are, N&A decided to make some scrum-diddily-umptious cupcakes for the little kiddies for the "Fun Friday!" Now being an animal themed week we wanted to do something related, and decided to do animal cupcakes! Of course we didn't exactly have all the materials to do the decorating since N is the one who has all the cake decorating supplies in Indiana! But we tried to make-do with what we had! 
So we went over to the Wal-Mart and bought some delicious Nutter Butter cookies, Swedish Fish, Marshmallows (big and little!), and some starburst! These delicious supplies were used to decorate our awesome cupcakes! We had to use ziploc baggies to pipe out our icing too! But it still looked half-way decent! 
Now when we were doing this, our favorite cupcakes were the hippos! And we thought for sure that they would go first with our campers! Of course not all goes as we think, since we also thought our cupcakes would be about ten times cuter! But oh well! We thought they were adorable! So here ya go!
Cupcake Ingredients:
1 1/2 Cups Unsalted Butter
2 Cups Sugar
5 Eggs
4 Large Egg Whites
2 tsp. Vanilla Extract
4 1/2 Cups All-Purpose Flour
2 tsp. Baking Powder
2 tsp. Baking Soda
1/2 tsp. Salt
1 1/4 Cups Milk

Cupcake Instructions:
Preheat your oven to 350° and line your cupcake pans! Its a lot of cupcakes for this recipe! 
Sift or whisk together the flour, baking soda, baking powder, and salt and set aside. Put your egg whites in a separate bowl  and whip until medium peaks form! Set these aside for later!
Start of by creaming the butter and sugar together until light and fluffy. Add the eggs in one at a time, mixing completely before adding the next egg! Then you need to mix in your 1 1/4 c. milk and the flour mixture alternately, mixing very well after each. Beat on medium-high speed for 2 minutes after all the stuff is mixed in. :) Last you need to fold in your stiffened egg whites! Make sure you don't deflate your egg whites when doing this! be nice and delicate =) 
Put these in your cupcake pans, filling about 3/4 full and then pop them in the oven for about 20-21 minutes! Then they are done! Yay! Let cool completely before decorating with your awesomeness!
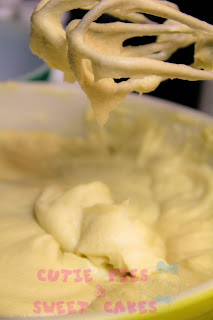
Beware the delicious Cake Batter!!!


Easy Vanilla Buttercream:(adopted from Annie's Eats)
2 ½ sticks unsalted butter, softened
2 ½ cups confectioners’ sugar, sifted
1/8 tsp. salt
2 tsp. vanilla extract
2 tbsp. heavy cream 


Directions:
In a stand mixer fitted with the whisk attachment, beat butter at medium-high speed until smooth, about 20 seconds.  Add confectioners’ sugar and salt; beat at medium-low speed until most of the sugar is moistened, about 45 seconds.  Scrape down the bowl and beat at medium speed until mixture is fully combined, about 15 seconds.  Scrape bowl, add vanilla and heavy cream, and beat at medium speed until incorporated, about 10 seconds.  Then increase the speed to medium-high and beat until light and fluffy, about 4 minutes, scraping down bowl once or twice.   
Separate your icing into smaller bowls and dye each bowl different colors. we used green, yellow, orange, blue, and pink!
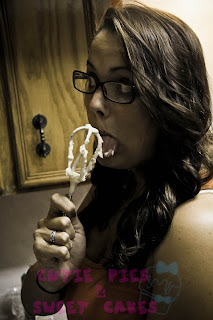
Licking the Beaters of the Icing! The best Part! <3

Decoration List:
Mini-Marshmallows
Regular Marshmallows
Red and Pink Starburst
Swedish Fish
Red and Pink Sprinkles
Nutter Butter Cookies

To decorate, choose what animals you want to do. Here is what we did!
Alligator:
 Ice the whole cupcake with green icing, Stick on a Nutter Butter cookie with about half on the cupcake and half sticking off of it, and place about a tsp. of green icing on top of that, make sure you can see the lines of the cookie through the spread out icing so that it looks like scales! Cut a mini marshmallow in half and squish it on the long sides to make it a little more rounded, and stick this on the top of the Nutter Butter thats on the cupcakes for the eyes! Use a small round tipped piping bag or ziploc bag with a very tiny piece of the corner cut off, to cover the sides of he cookie and around the back and tops of the eyeballs! Take white icing and pipe small lines on the 'mouth' of the gator, for sharp teeth! Then add dots to the middle of the eyes, and sprinkle with green glitter! Tada! You're done!
Hippopotamus:
Pretty much the same as the alligator, but use pink icing, or whatever color you want to use, and use cheerios for the ears and nose. Pipe small round white dots for eyes on the Nutter Butter and another small colored dot in the middle of the white for the pupil. Then it's done!
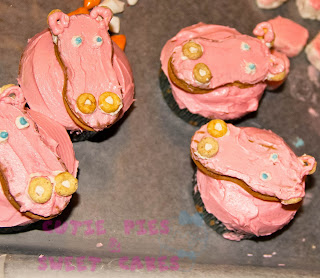
A's Finished Hippos!

Lion:
Cover your cupcake with whatever color you want your Lion, then pipe the 'mane' on the outside of the cupcake with a small star tipped piping bag. Use a darker color than the one you used for the lion color. Use a mini-marshmallow that is cut in half diagonally and dip the sticky side in red/pink sprinkles. Stick these in the mane so they are slightly sticking out. for the nose use red starburst, cut into pieces and then rolled into the cat-like shape of a nose. It should look kind of like a heart, but not such a crease on the top of the heart. Use icing or rolled starburts pieces to make the mouth and whiskers! Pipe the eyes on with white and another color of icing.
N Decorating the Lion!
Pig:
The pig cupcakes are so cute! All you need to do is cover your cupcake in pink icing, cut a regular marshmallow in half and stick it on the pick cupcake. Cover that with the icing too. Use the cheerios as the pig ears and cover with icing.Pipe on eyes and the dots on the nose! So easy and super cute!
Penguins:
The penguins are N's personally favorite! She LOVES penguins! So using white, pipe a semi-circle on the bottom of the cupcake. Fill with the white icing. Using black/blue icing cover the rest of the cupcakes. Pipe big oval eyes on the blue part, then using a starburst that has been cut in half diagonally into a triangle, stick it on the cupcake a little lower than the eyes! And you're done!


So there are a lot more animals you can make, and we made a couple more but they didn't look as good! These were are favorites, and the kids favorites too! Out of all the cupcakes, the lions went first, then the pigs, then the penguins, then the lions! The Hippos were last! But it was ok because N&A got to eat their favorites!


Luvyerguts<3
N&A

Sunday, August 7, 2011

Texican Turkey Tacos


We are all about ground turkey at our house-turkey burgers, turkey tacos, turkey spaghetti, turkey casserole, turkey sausage-we adore it!  Daring the recent ground turkey salmonella incidents, we decided to use ground turkey twice in one week (I know, I'm sure you're all shocked).  This time we went with turkey tacos, with a Texican twist! :)

Taco Meat:

1 lb ground turkey
2 tablespoons red pepper
Sea salt and ground black pepper to taste (A used about a tablespoon of each)
1-2 teaspoons each chili powder, paprika, cayenne pepper
We also used about a tablespoon of a premixed fajita seasoning that we have that was picked up from a local vendor


Put all of these things into a large bowl and mix them up-use your hands (wash 'em first!) and don't be afraid to get dirty because ground turkey gets quite sticky! Another way to do this would be to put the turkey into a pan, and sprinkle the seasonings onto it as it cooks.

To garnish our tacos we used chopped iceberg lettuce, diced roma tomatoes, diced red onions, sliced avocado, shredded cheese, and chopped green onions.


Add or subtract toppings to your liking, and most importantly: DON'T BE AFRAID TO BE CREATIVE!

Because a taco is pretty much a complete dinner in a shell, we paired ours with tortilla chips and salsa and called it done! Enjoy.:)

Loveyerguts<3

A&N

Cheddar Cheese Turkey Burgers

So a few nights ago, N&A decided to make turkey burgers! But A ended up having a fancy date with her boyfriend. So N decided to go ahead and make the burgers for the rest of the fam! We had some lovely ground turkey from the H.E.B, nothing fancy, just some lean ground turkey. And N wanted to spice it up a little! So she went ahead and grabbed a few rando things from the spice rack/cabinet and began throwing some delicious mixtures into the ground turkey! Now N is not the biggest measurement taker when she makes main dishes, but she tries to remember how much she added when making the recipe! So you can change up the spices in the recipe as much as you want, make it to your liking!! N certainly likes things spicy, so if your not big on that, you can go ahead and subtract that red pepper! 


Recipe:
1 lb. Ground Turkey
1 tbs. Ground Red Pepper
2 tsp. Chopped Parsley
1 1/2 tsp. Salt
1 1/2 tsp. Pepper
1 tsp. Paprika
1 cup Shredded or Very Small Cubes Cheddar Cheese
1/2 cup Parmesan Cheese


Instructions:
Take all your ground turkey and toss it in a big bowl! Mash it all up with your fingers to get it all mushy and nasty. =p
Next throw all the spices into your turkey and mix it up, thoroughly! You don't want any big clumps of spices in one burger! Then toss in your cheeses and mix them in so the cheese is in every bite! 
Form patties using a patty maker or just get a ball of turkey in your hands and mash it into a patty! Either way works! I did the later! 


Throw on the grill, we have a nice Master Griller, Marty, who is in control of cooking such delicious entree's as these burgers! 
Our Master Griller!


Then just top it off with whatever you want on your yummy burger! I used spinach and tomato! Then had a honey dijon dressing instead of ketchup or mustard! Enjoy!

Loveyerguts<3
A&N